

How To Make A Window Bird Feeder
Difficulty
Starter Projects
| 
Make a window birdfeeder from scrap forest!

Spring is finally here for us, and we've been broken-hearted to work on an outdoor projection. Grace has been wanting a birdfeeder, and I've been wanting birds chirping outdoors, so we set out to make skilful use of our bit pile.
I've been seeing those window birdfeeders, and thought we'd give it a try. Then nosotros can enjoy the birds indoors as well!

We had some flake 1x8 boards in pretty terrible condition, and of course, quite a few 1x2 and 1x3 scraps. So we were able to build this little birdfeeder for gratis!
I likewise repurposed some suction cups that I had institute on an old machine accessory for adhering the birdfeeder to the window.

And then we just filled up the little tray, and the hard office begins. Waiting for the birds to find the feeder.

You tin can make this birdfeeder as well! I bet yous have the scraps lying around.
PS - We take never had an issue with birds flying into our windows and go along our windows overnice and dirty to prevent bird injuries.
Dimensions

Preparation
Shopping List
ane - 1x8 @ xviii" long
1 - 1x3 @ 15" long
one - 1x2 @ xvi" long
Gum and 1 1/4" nails
iv suction cups and screws
birdseed
Cut List
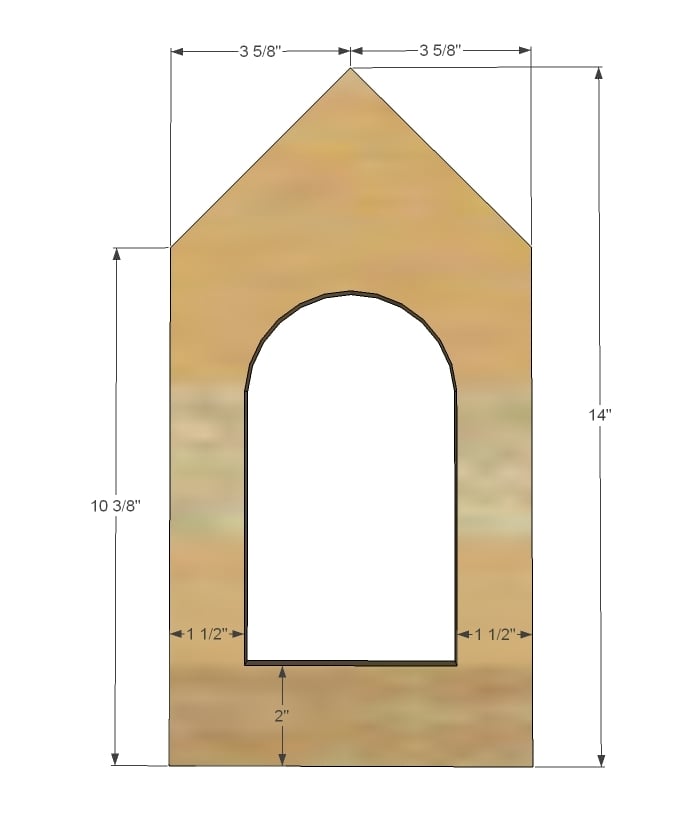
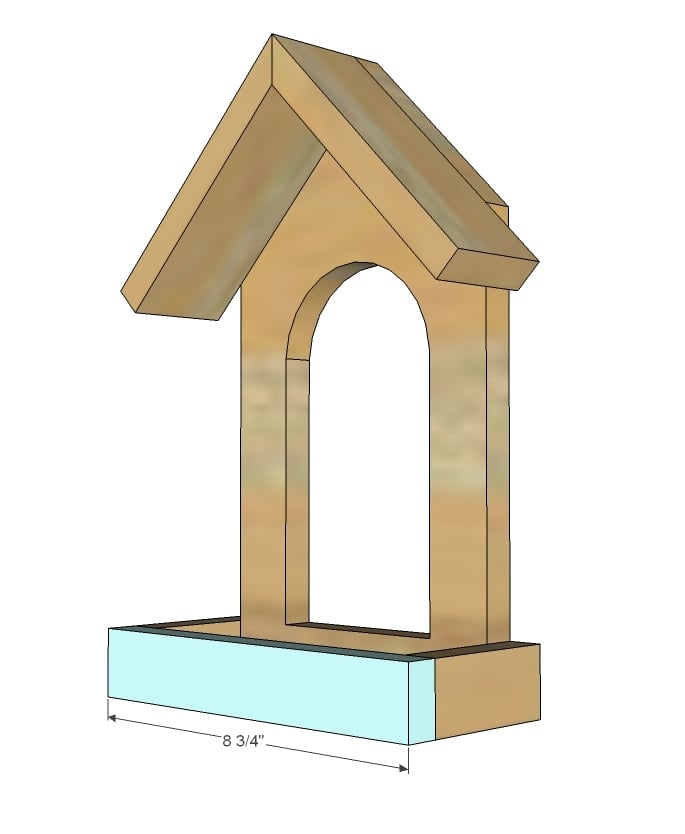
1 - 1x8 @ 14" (principal slice)
1 - 1x8 @ 2 ane/2" (tray bottom)
2 - 1x3 @ vii" (top end cut at 45 degrees off foursquare - roof) - NOTE: You could cut one at half-dozen i/4" and one at seven" and attach to form the roof if you do not have a miter saw
two - 1x2 @ 3 1/4" (tray sides)
1 - 1x2 @ 8 3/iv" (tray front)

Full general Instructions
Delight read through the entire plan and all comments before beginning this projection. It is also advisable to review the Getting Started Section. Take all necessary precautions to build safely and smartly. Piece of work on a clean level surface, free of imperfections or debris. Always apply straight boards. Check for square after each step. Always predrill holes before attaching with screws. Apply glue with cease nails for a stronger agree. Wipe excess glue off bare wood for stained projects, as stale gum will non take stain. Exist safe, have fun, and ask for help if you need information technology. Expert luck!
Instructions
Pace 1
From the 1x8 cutting out the back every bit shown above. I used a jigsaw to cutting center out. I highly recommend sanding your cut at this stage - it'll exist much easier to sand now than after the lilliputian baboon feeder is assembled.
Pace 2
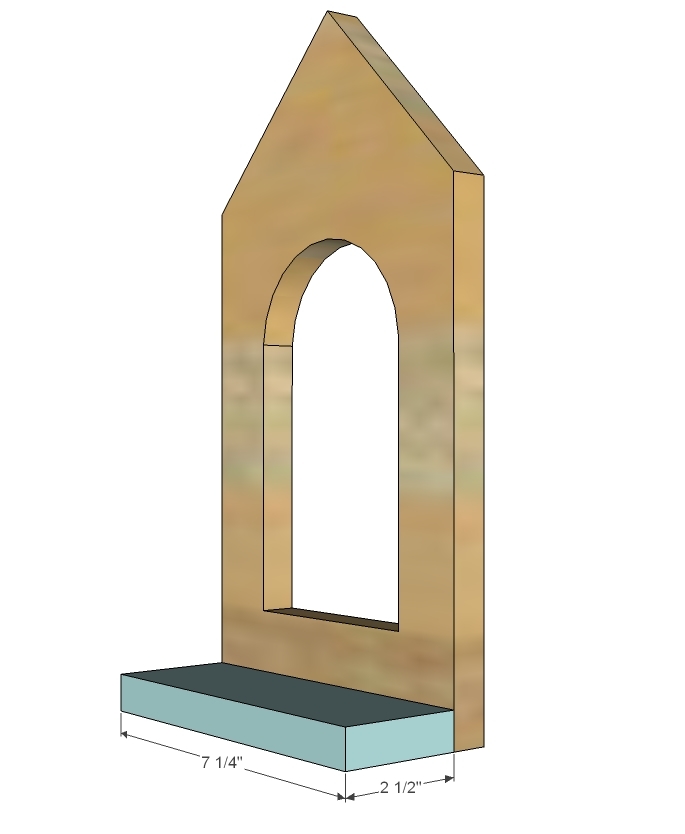
Then add the bottom tray. I used glue and 1 1/4" end nails.
Pace 3
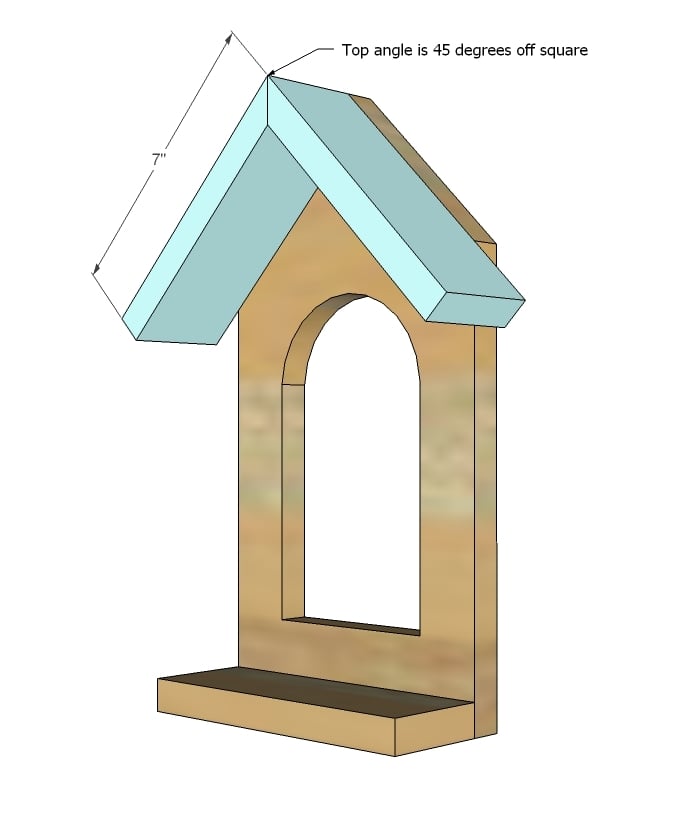
I went alee and built the roof get-go. then attached it to the back with one i/4" finish nails and glue. Lots of glue.
Step four
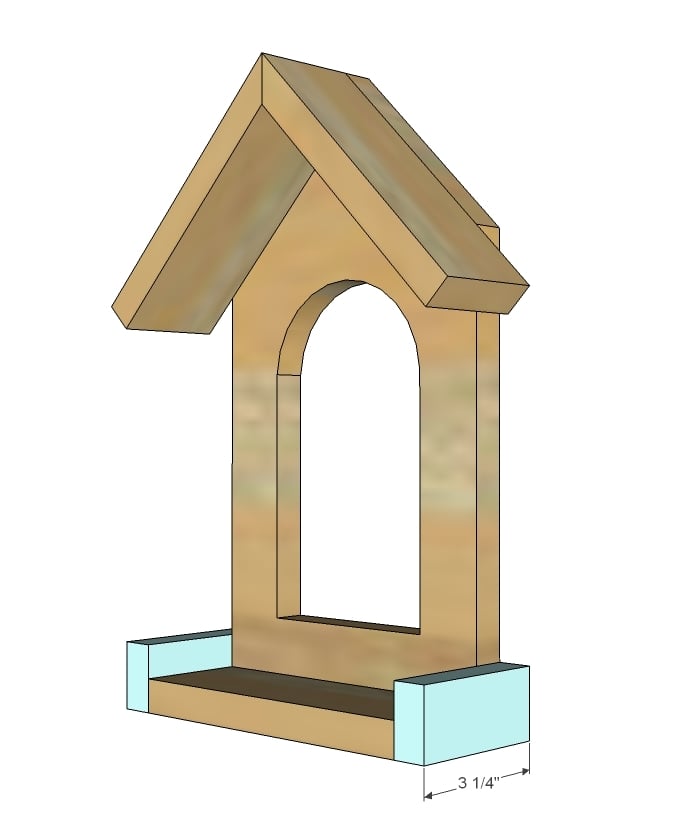
Now the sides. Make sure yous attach to back and bottom.
Step v
Preparation Instructions
Fill up all holes with wood filler and let dry. Employ additional coats of wood filler as needed. When woods filler is completely dry out, sand the project in the direction of the wood grain with 120 dust sandpaper. Vacuum sanded project to remove sanding residue. Remove all sanding residue on piece of work surfaces equally well. Wipe project clean with damp textile.
It is e'er recommended to apply a test glaze on a hidden area or chip piece to ensure color evenness and adhesion. Utilize primer or wood conditioner as needed.
Source: https://ana-white.com/woodworking-projects/window-birdfeeder
Posted by: voglnevill.blogspot.com
0 Response to "How To Make A Window Bird Feeder"
Post a Comment